Monday, November 21, 2016

My lead time is disappearing fast.

How did that happen? I hoped to have my December afghan nearly finished by now, instead, I'm only a little over a third of the way finished! Well, I unraveled the first square three times before I got it right. Then, my younger daughter told me that she needed a baby blanket for a dear friend's baby shower. That slowed me down, but I did get that blanket finished before the shower.
Then, I remembered that I had promised my daughter-in-law a crocheted nativity set. I had started it last year and my older daughter said it was so cute that she wanted one, too. Ok. It IS cute. I want one too! I told them that this is a several year project. This year, they get Mary, Joseph, a manger, a star, and a baby Jesus. I have to make 2 more Josephs and that project will be finished for this year. 
I may be cutting it close to finish my afghan!

Monday, November 7, 2016

I'm getting an early start on my December afghan

Last week, a friend posted on Facebook that she was looking for a "peppermint candy"afghan. I thought that looks a lot like the pattern I wanted to make for December. It's close, but not exact. The pattern I'm making is on redheart.com. It's called peppermint throw and pillow.  I'm not going to make the pillow. I think the afghan by itself is strikingly pretty. It's marked as expert skill required. At first, I thought that's just because it's big and will take a lot of time. Then I started it! I had to rip out several rows 3 times before I understood the instructions. That was so frustrating. I did finally get it. The pattern said to make all 42 of the big circles and all 30 of the little squares before sewing them together. I want to see progress, so I'm sewing them as I make them. So far, I have 4 big circles and 2 little squares made and sewn. Yes, this will take a while to make.

Sunday, October 30, 2016

Halloween Afghan

I've ignored my advice about lead time and this afghan won't be ready for this year. I'm still not sure what colors I'll be using! Yellow and orange, for sure. I want a third color, but which? Brown? Burgundy? Black? I'll have to ask my daughter who has an October birthday. She likes Halloween.
 The basic pattern will be very like this, except the granny squares will be 3 rounds, instead of 4.
Also, I intend to join the squares by joining in the back loops. I just like the looks of this join.
So, I'll start with a few rows of yellow squares. Then, I'll start adding a few orange squares randomly, more squares of orange each row until each row is only orange. Then, I'll add squares of the third color, randomly, until each row is only the third color, then I'll put a border row of each color for 3 rows of border.
Simple, easy, and easily customizable by changing colors to whatever you choose.

Sunday, September 11, 2016

Striped Scarf

My sister's birthday sneaks up on me every year! This year I decided to make an infinity scarf for her.  I still had some yarn in mint green, her favorite color. After I started it, I realized it wouldn't be enough and I knew I'd never match the dye lot, so I bought some white.
Chain 35, using the main color - makes 32 stitches plus 3 chains for the first dc, for a total of 33 stitches. I didn't count how many rows long it was, just measured 66 inches long.
Work dc in 4th ch from hook and in each chain across, 33 dc (first ch 3 counts as a dc in each row).
Ch 3, turn work dc across. Repeat for 20 or so inches. I only put one block of white in the middle.
Tie the white on. Ch 3, using both colors, this carries the color you're not using up a row without any loose strands. Using only white, work 2 rows of white. For the last stitch of the second row, use both colors to carry both colors up to the next row. Every other row you will need to work both colors up to the next row.
Work 6 rows of main color.
Work 4 rows of white.
Work 4 rows of main color.
Work 6 rows of white.
Work 2 rows of main color. Fasten off and work end in.
Work a nice block of white, as little or as much as you like, I worked the block until the scarf was about 42 inches long.
Then tie on main color and work alternating graduated stripes. After the 2 rows of white, fasten off and work the end in.
I then worked a block of the main color until it was 66 inches long.
Fold it in half and join the ends using slip stitch into a circular scarf.

Continue down one side with sc to make an even edging. I find that by working 1 or 2 stitches on the sides of dc stitches makes an even edge, you may need more or less depending on your gauge. After you've worked around, join and fasten off.
Fasten on white on other edge of the scarf and work an edging row.
My sister loved her hand-made, Valerie original. She put it on immediately and didn't take it off. It makes me feel so good when someone like something I've made!

Sunday, August 28, 2016

Mending Items

Well, I've made more work for myself. A friend of my sister's had holes in a loose knit sweater that she asked me to mend. Not my favorite task. When I finished, she couldn't find where I had mended it. She was ecstatic. At least she paid me for my time.
Now she has a knit scarf with a hole. She offered to pay me if I could fix it. I'm afraid the yarn has been cut. I don't think I'll be able to match the yarn weight or color.
First step is to put knitting needles in each stitch on both sides of the hole so it won't unravel.
Then, tie on some yarn as closely as I can match.
Then, using a crochet hook, work the yarn through the stitches so they are all fastened and won't unravel. Trying to make purl/knit stitch look a likes. I'm afraid this mend will show.

Monday, August 15, 2016

Another Wedding Doily: Given

 I feel that I've been making this pattern for a very long time. I made 4 for friends' children before deciding that I should make one for my children and nieces and nephews - 13 more.
 Then, I decided it would be perfect for my parents' 50th wedding anniversary, made in gold metallic thread. That turned out so well that I made one in silver metallic thread for my brother's and his wife's  25th wedding anniversary.
This is the white made for wedding presents, unblocked. This week end involved a 6 hour (one-way) drive to my brother's for his daughter's wedding. Another niece mentioned she has her doily on their table where they can enjoy it every day. Hearing things like that about an item I've made always gives me a warm, fuzzy feeling.
This was the 8th doily I've gifted to my parents' grandchildren, so I need to make 5 more. The youngest grandchild is 11, so there'll soon be a break in the rush to make these doilies. Except now there are 4 young, married couples who haven't yet started their families. I need to be making baby blankets!

Monday, August 8, 2016

Miscellaneous Projects

I haven't been working on any one special project lately. I've still been working on scrubbies. Most of my family's RAGBRAI team wanted one after they gave so many away last week. I mailed the last few today. That's good, because I was getting bored making the same thing over and over and over....
I've been cutting more bags to get enough white plarn to make a shoulder bag. I'm getting WAY more balls of colored plarn. I think I'll have enough to make a rug. No, I need to finish some WIP's before starting another project!!
Meanwhile, I've been making coasters of different colors to go with my month doilies.

But, again, I'm getting bored making the same pattern over and over and over....
I've GOT to finish something!!

Monday, August 1, 2016

White Shoulder Bag

As if I don't have enough shoulder bags!


When I cut bags to make plarn, I lay the strips in a line in the same order as the uncut bag. I tie them in order, left to right or top to bottom. I feel that makes for a more even distribution of colors. My mom sorts the strips by color. Mom would sort the pictured bag into 4 piles: white, blue, red, and blue with red. Then she would tie the strips randomly from each pile.
It takes more than 90 bags to make a shoulder bag, because most stores have so much printed on their bags that we get only 2 or 3 white strips from each instead of 12.
I've started one, but after cutting 9 bags, I only have enough to make the bottom 3 inches long. I want 9 inches for the bottom and the bag to be 9 inches tall! This is going to take a while!

Monday, July 25, 2016

Shoulder Bag, red and yellow speckled: Finished

I do so enjoy finishing a project! Maybe I'm finished making shoulder bags - for a while! Right now, I can't think of a store which uses bags for customers of a color I haven't crocheted into a shoulder bag. That's good, because I have so many other things I'd like to make.
This week, my daughter and other family members are on RAGBRAI (the Register's annual great bicycle ride across Iowa). I've been frantically making scrubbies for them to give to the lady of the house each night when they park their RV in a different yard across Iowa. They left Saturday, so now my question is: "What project do I finish next?"
 Maybe another baby blanket. I have a niece who is past her due date.
 Maybe another coaster to match a month's doily.
I'd like to finish this afghan, but it's just too 
Hot!!
I vote for the baby blanket.

Monday, July 18, 2016

Lark's Head Stitch, Fringe

I don't make a lot of fringe. I put some on a shawl in the late 70's, and it tangled so much that I don't wear that shawl often.
This is not really a crochet stitch. I think of it more as a latch hook stitch.
I do occasionally use it to put trims on smaller items.

 These zebra striped slippers for my nephews needed a mane.
These slippers for my sister are cuter as fuzzy "animals". I glued on eyes and made small ears before putting on the fringe, which covered them.
Very simply, I cut yarn to 3" lengths. If you want longer fringe, cut longer strips. The knot will take up some of the length. Fold the yarn in half. Put your hook behind the post of the selected stitch. Pull the fold of the yarn part-way through. Catch the ends and pull through the loop. Pull on the ends until they are tight. You may want to trim after all the fringe is on to get it even.
I'll also be using this to put a mane on the donkey for my Nativity sets.

Monday, July 11, 2016

Red and Yellow Speckled Shopping Bag: Finished

Maybe I start so many projects because it feels so good to finish one. Maybe not. I just have too many ideas. I also have lots of these bags left. They're not even all cut and tied, but I can still see that I have more than enough to make a shoulder bag. So, of course, I've started one!
This bag is almost big enough to be a beach bag. 7 1/2 x 15 x 13 with 25" handles. I took it shopping to the grocery store where Mom got the plastic bags. The cashier and bagger were fascinated. So, we had quite a discussion about crocheting with plarn.
This past weekend, Mom and I went to visit family. My cousin's son in law is a fan of the university whose colors are in the bag. He liked it.
I'll eventually have shoulder bags of many different schools' colors. The shopping bags take too long and use so many bags, that I doubt I'll need to make many more of them.

Monday, July 4, 2016

Pending to WIP to finished

I had a shoulder bag and shopping bag pending while waiting for more bags. My mom was saving bags from two different stores for them. I just needed a few more for the shoulder bag. When I need fewer than 10 bags to finish a project, it goes quickly. It's still satisfying to finish. Now I have a lovely white with green specks shoulder bag.
The shopping bag needed lots more. The bags made a huge pile in my living room. I'll be cutting and rolling for a long time! This is a big bag. 7 1/2" x 15" x 13", with 25" straps 15 stitches wide. Mom doesn't like such wide straps. She says they're too wide to hold. I say they fold and bunch up in my hand and feel fine to hold. Plus, I think they're stronger. I finally started the first handle, so the end is in sight. I think there may be enough bags to make a shoulder bag as well! These will be white with red and yellow specks.
There's always another project I want to make!

Monday, June 27, 2016

Plarn Rose Scrubbie

I started this the same as the other scrubbie, working in rounds in single crochet. 7 rounds made a nice size for my hand. Then, instead of finishing off, I chained 3, turned, and working around the post of the sc, I worked dc around the spiral back to the middle. Finish off.
I can't claim this as original to me. I saw a picture on Pinterest, but there were no directions. It has more nooks and crannies for scrubbing grime off dishes. It does take longer to make. I think I'll probably make more of the plain scrubbies than I make of these.

Monday, June 20, 2016

Octagonal Plarn Basket.......

Well...it's not really octagonal. When I stopped increasing, the sides curved up and curved evenly into a round. By increasing over the same stitches each round, the bottom looked like an octagon. I'll have to try something different if I really want an 8 sided basket. I made the sides a little higher than the granny square basket. Now, I need to cut and roll some of these bags...

Monday, June 13, 2016

Plarn Phone Stand

I was reading the 5 little monsters blog, she had a post of a phone stand. It looked like a pillow to me. She's right, it would make quite a nice present for a dad or a grad.
But I wanted something simpler......
This took less than a full roll of plarn (10 bags).
It fits my iphone 6Plus.
ch 16.
sc in 2nd ch from hook and in rest of ch across. 15 sc.
ch 1, turn, sc in each sc across. 15 sc.
Repeat 22 times (23 rows).
ch 17.
sc across back of stitches of 1st row.
ch 17.
join to end of row 23. Finish off.
Quick and easy and it holds my phone up for watching videos.
I put a heavy glass behind my phone to prop it up and keep the stand from sliding.

Monday, June 6, 2016

Plarn Granny Square Basket: Finished..

Almost.
The sides are tall enough to use for holding plarn balls. I didn't finish off, because I might decide that I want the sides higher.
I worked the granny square until it was 11 inches on each side. Then I started working each round even: Instead of two 3 dc clusters and 3 ch in each corner, I started just putting one 3 dc cluster in the corner, the same as I had been putting in each ch 2 space on the sides. It went a bit bigger on the bottom, the same way my shopping bags do. The bottom is about 12 inches on a side. I've worked enough rounds to get 4 inches high on the sides. That's big enough to hold a lot of plarn balls. Now it's much neater in the craft room.
The first few beginning rounds went fast, because they were smaller. Each round got longer as I increased in all four corners. Progress seemed to be very slow. Going around while working the sides also seemed slow. Four 12 inch sides meant crocheting for 4 feet to get around once.
Another plus is that the balls would unroll in the bag so that I had a tangled mess of plarn.  This basket controls them better. Less unrolling, less mess, which makes it easier for me to see how much of any one color I already have cut and rolled.

Monday, May 30, 2016

WIP and Pending Projects

A friend brought more bags to me this week. It's always fun to see an assortment of bags all at once. There was one Target bag for my shopping bag which was pending more bags. That one bag is cut, tied together into plarn and crocheted into the bag already. One bag doesn't even go halfway around a shopping bag. Well, the bag is just over 7 inches tall, so it's big to hold skeins of yarn for the nativity sets I'm making. So it's useful even while it's pending.There were also 2 large and 4 regular sized Big Lots bags. They work into a white bag with orange and black spots. Perfect for October. I like the big bags. They make longer loops, which means fewer knots to crochet around. I'm making a shoulder bag with them. After crocheting these bags into it, I have it 5 1/2 inches tall. I like shoulder bags to be 9 to 10 inches deep, so I need a few more.
There were various other bags of colors I'm not currently making into anything, so they'll go into piles until I have 10 of  a color to cut and roll. I like to make balls of plarn of 10 bags. That's a good size. Not too big to hold while rolling, and big enough that I'm not stopping all the time to tie on a new ball.
I like calling some projects pending.  Really, there's no progress on a project while I'm waiting on more bags for plarn. Having fewer WIP makes me feel that I'm making better progress on them. Am I just fooling myself?
 This is a shoulder bag, already finished it. It's made of Target bags, just to let you see how my shopping bag will look. And another baby blanket, WIP.

Monday, May 23, 2016

Thoughts on the Crocheted Nativity Set

The free pattern, and pictures, are at www.5littlemonsters.com/2015/11/crocheted-nativity-set.html#more
As I've said before, this is too cute for words! My daughter-in-law, my older daughter, and I all want sets. I usually get bored if I make the same pattern over and over. However, I've been working on this pattern all the past week, and I've found that the pattern is so many little parts that I don't get bored.
I have made a few changes to the pattern which I think make it easier to make. Remember, patterns are just suggestions.
First, the manger. I don't like to make little parts and sew them together if I can make one bigger piece, so I made the bottom first. Then, instead of finishing off and starting another little piece, I just started working around the sides, no increases so the sides would go straight up. This is the same technique I use on my plarn bags.
Second, the hay. The pattern called for loop stitches. I don't like loop stitches. I think they come apart too easily, so after the sc, instead of wrapping the yarn around my fingers to make a loop, I chained 10, sc in next st, ch 10 across. On the next row, sc in each sc.
Third, the weighted bags. I made the cloth circles as described in the pattern, but used BB's for the weight. I found them in the sporting goods section of Wal-Mart.
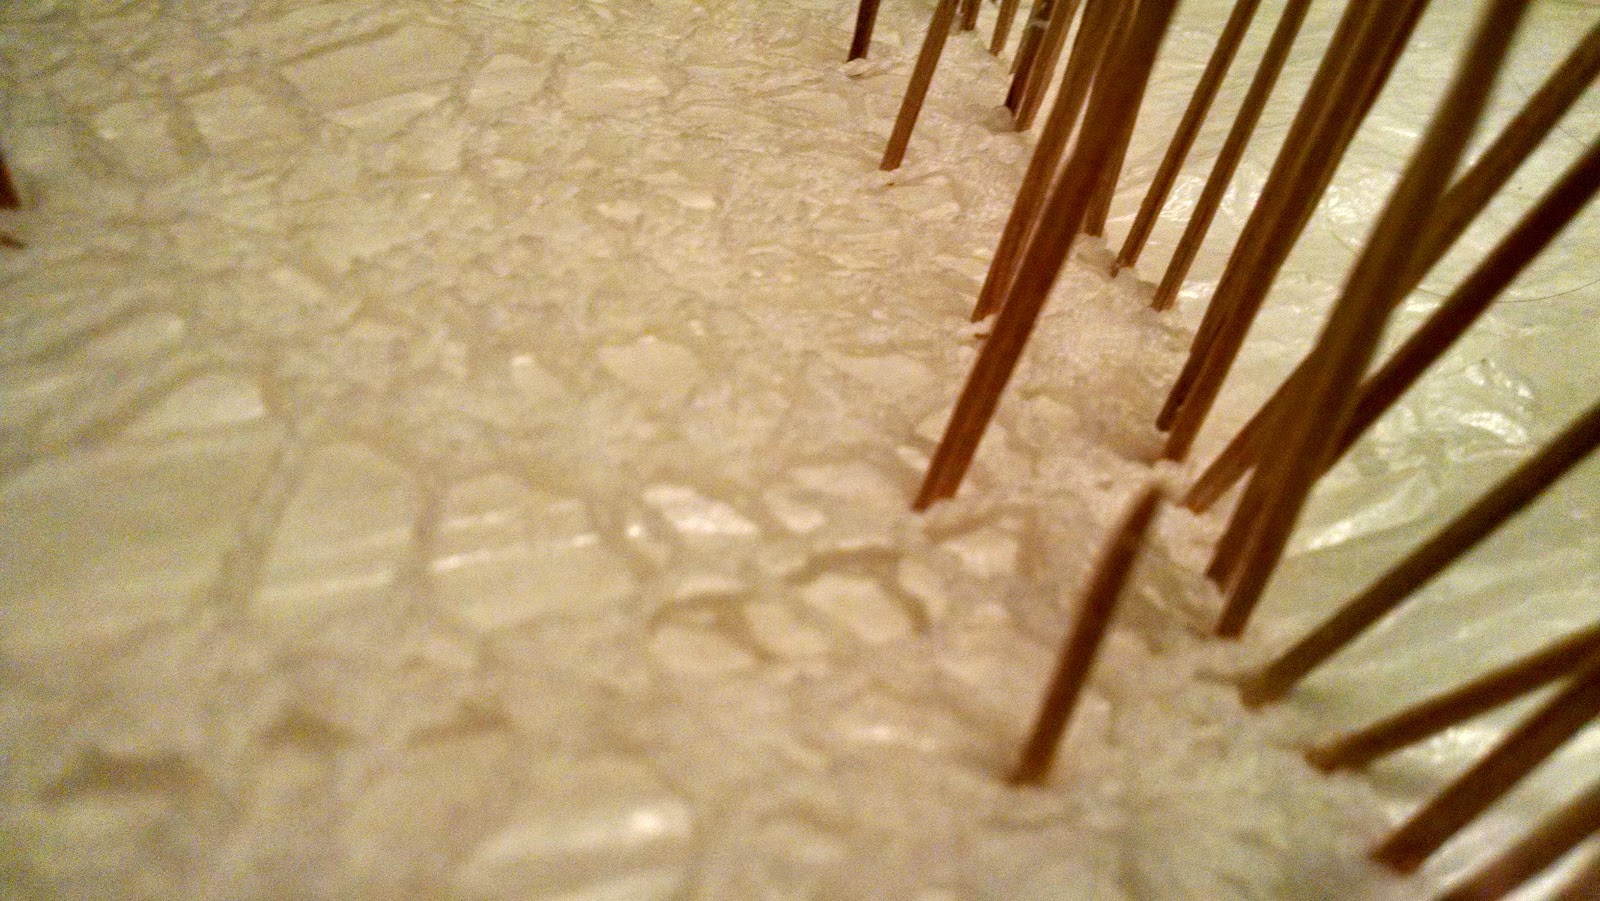
I'm also trying to make a stable. I recently had 4 trees cut down in my yard, so I have lots of twigs. I've been spending lots of time in my yard, cutting twigs, and small sticks into 10 to 16 inch lengths. I don't have enough yet. I'm surprised at how many I seem to need to make 3 walls and a roof. I have brown crochet thread to tie them together. If that's not sturdy enough, there's always my hot glue gun!
Besides being cute, the set will be kid friendly. Little ones always seem to want to play with nativity sets. My mom had a ceramic set which my youngest sister always wanted to play with. Mom didn't want the figures chipped or broken as the set was a gift my dad's secretary had made for them over several years. Crocheted items don't chip or break and won't hurt a child if they fall.
I'll make 3 sets of  Mary, Joseph, baby Jesus, the donkey, star, manger, and hay first. If I still have enough time, I'll make the shepherds and sheep. If not, I'll add them next year. The year after, I'll make magi and camels, providing I can find or make up camel patterns. I'll probably use crochet thread for the presents, crowns and blankets for the camels' humps. That will give me more color and I have silver and gold thread.
This is making good inroads on my stash of left over yarn, although I have bought some yarn for colors I didn't have. (Yellow, grey, and purple)

Monday, May 16, 2016

Yellow Plarn Shoulderbag: Finished

...Finally!
I wondered if I would ever finish this shoulderbag. I rarely shop at Dollar General Store. It's just not on my shopping route. It's odd because there's a Dollar General Store closer to my house than any other store. Anyway, this bag has been sitting in my wip pile for over 2 years, usually waiting for more yellow bags. The bags would come in one or two at a time, usually from a friend. I would work them into the bag as soon as I got them, then I'd have to wait for more.
These shoulder bags take about 28 hours to make, including the time to cut and fasten the bags. That's one reason why these two years of waiting for more bags has seemed so long.
Maybe I need a new category for my projects: Pending (more bags to make plarn). That way my wip list isn't so long. I have a Big Lots shoulderbag that could go there. It will be white with orange and black spots - perfect for October. The Target grocery bag will soon go there. I'm working on the last plarn ball I have for that bag. I don't like working with Target bags. They're a 4 instead of a 2, so I don't think they mix well with most of the rest of my bags, too stiff and they stretch easier. It may sound strange, that a stiffer strip would stretch easier, but they seem to do just that. It's like mixing worsted and sport weight yarns.

Also, I don't think the red on other bags is the same. These seem to have more red in the mix. Just my OCD, unless I'm making stripes, I want the color to be spread evenly in the project.
So, it looks as if I can pull out some more wip.....maybe the crocheted Nativity set. I only need 4 of those! Back I go to the 5 little monsters blog for the pattern.......

Monday, May 9, 2016

Is it Possible to Have too Many WIP?

Yes.
While I like having several wip, so that I can switch when I get bored, I have found that 10 is just too many. I only have so many hours to crochet, and having 10 projects going at once means that I don't see progress on  most of them.
 I have a wedding doily started which I haven't touched in several months.
 This shoulder bag has been waiting for more yellow dollar general bags. Happily a friend brought me more, so maybe I'll get this finished. I haven't touched this baby blanket in months, either. I find lack of progress depressing, even if I do finish other projects, so I really mean it this time when I say, "I have to finish several projects before I start something else!

Monday, May 2, 2016

Too Much Pinterest

I don't know why I keep going to Pinterest. Those e-mails about "??? re-pinned your pin" catch me every time. I'm just too curious about which of my pins looked good to someone else, I guess. Then I just have to see what's new. There is always some thing that catches my eye.Then of course I have to pin it. I don't know why I have a kids board. I have no young children and no grandchildren (yet). Still, that seems to be the board which gets the most new pins.
I have so many wip. I need to be working on them. I NEED those wip baskets!
Granted, I lost several hours this week when my old phone died. I'm still trying to learn how to use this new phone. That and the new games on it are like a black hole. I don't even notice how long I've been playing with it. Oh, well, eventually, it'll be old hat and I can get back to my life!
This week on Pinterest, I noticed more "vintage" items. Not that I'm likely to make myself a granny square dress, but it was just too cute, so I pinned it. And that baby ponco! No grandchildren to need it, yet, never know, so I pinned it. Shawls! I really like shawls! I might make myself some more shawls, so I pinned them. Afghans! I still have months without  a special afghan to put on the back of my couch just for that month, so I pin lots of afghans.
Do I really need these pins, patterns, and pictures? No, but at least they're not taking up shelf space like my pattern books. That's some consolation....Oh, look, Pineapple Doilies!! I have to pin those...

Monday, April 25, 2016

Plarn Basket

I like having my wip in baskets. It is neater and I feel so organized. So, here are two ways to make granny square plarn baskets.
For the first way, make 5 granny squares, 1 for the bottom, and 4 for the sides.
www.crochetingwithval.blogspot.com/2014/06/granny-square
They all need to be the same size. So, decide how big you want the bottom, and how tall you want the sides. You could make it taller by putting another row of 4 granny squares over the first row of 4.
To join, you have 2 choices. For a tighter join, use slip stitches.
www.crochetingwithval.blogspot.com/2014/06/finishing-off-slip-stitch-joining
For a more open join:
www.crochetingwithval.blogspot.com/2014/06/granny-square-afghan
The second way to make the basket has no joins and is worked entirely in rounds.
Ch 4(starting chain, dc). Dc in 4th chain from hook (starting chain). Ch 2, 2dc in starting chain. Ch 2, 2 dc in starting chain. Ch 2, 2 dc in starting chain. Ch 2, join with sl stitch to first dc (ch 4 of beginning chain). 4 dc and 4 ch 2 spaces.
Start spiral. Ch 1, sc in same space as joining. 2 hdc, ch 3, 3 dc in same space. 1st corner. Ch 2. 3 dc in next space. Ch 3, 3 dc in same space. 2nd corner. Ch 2. In next space, work 3 dc, ch 3, 3 dc. 3rd corner. Ch 2. In next space, work 3 dc, ch 3, 3 dc. 4th corner.
Ch 2. In space between the hdc and dc (1st corner), work 3 dc, ch 3, 3 dc. Ch 2. In next space, work 3 dc, ch 2. In space of 2nd corner, work 3 dc, ch 3, 3 dc, ch 2. In next space, work 3 dc, ch 2.
Continue working 1 3 dc groups in the side spaces with 2 chains on either side. And working 2 3 dc groups in the corner spaces with 3 chains between them.
Continue working the spiral until the bottom is the size you want.
This has been increasing so the bottom would lie flat, but now, to get the sides to curve up, you have to stop increasing.
Now, in every space around, work 3 dc, ch 2.
When it is tall enough, you can add handles, unless you want to just use the holes of the pattern for finger holes.
www.crochetingwithval.blogspot.com/2015/05/plarn-basket-tote-tray
Or just finish it off by tapering down:
In next space, work 3 hdc, ch 2. In next space, work 3 sc, ch 2. In next space work 2 slip stitches, finish off.

Monday, April 18, 2016

Special Stitch: Picot

The picot stitch is generally used in the edging row.
It adds visual interest. I have slightly changed how I make picots from how the patterns usually are:
Ch 5, sc in fifth ch from hook. Somehow, I never liked how that looked.
So, instead, in this case, I would ch 5, sc in same stitch (sc or dc) where the chain started.
In other words, I will work the edging row per the pattern, until I come to the picot, work the number of chains it calls for, work another sc in the same stitch as the last sc before the chain, then continue the edging row. Some of these edging rows have loops instead of picots. Instead of sc in same stitch as beginning of chain, the pattern will say to skip some stitches. Longer chains will generally skip more stitches.


These bigger loops are used for joining strips together. They also give me the perfect place for toothpicks when I'm blocking a finished project.

Just my opinion, but I think picots in the finish edging look elegant.

Monday, April 11, 2016

I have enough lead time to make:

a crocheted Nativity set.
My daughter-in-law asked for this in November, I knew there wasn't enough time before Christmas at that point, and sadly I told her so. Then, my daughters saw it and wanted it, too! Well, it is too cute for words, and I want a set, too!
The pattern (and pictures) is at:
www.5littlemonsters.com
Posted on November 13, 2015, titled: crocheted Nativity set.
I like that the pieces are small and can (mostly) be made with left over yarn. I did buy some special colors. I didn't think my yarn colors would be bright enough for the Magi. I haven't found grey for the donkey, either. Who knows? I haven't dug all the way to the bottom of my left over yarn bags!
One other change: I use B B's for weights. I make the little bags as she said, but I use B B's to fill them. I'm not sure I'll make the star to be free-standing, either. I may fasten the dowel to the back of the stable.....
I have to get more of the set made before I decide.
Four Nativity sets added to my list of works in progress.......

Monday, April 4, 2016

Special Stitch: Cluster

 Whenever I've seen the cluster stitch in a pattern, it's been explained at the beginning of the pattern. Usually because there are minor variations from pattern to pattern, e.g. dc or trc, 2 or 3 stitches in a space. You can see it best here in the closing of the shells around the larger hearts/pineapples.
The border I put around the scarf makes the cluster stitch at the top end of the scarf harder to see.
 With no edging, it's much easier to see (on the right).
Here is a sample of cluster stitch directions:
*YO, insert hook in next ch 2 sp. YO and pull up a loop. YO and draw through 2 loops on hook. YO, insert hook in same sp. YO and pull up a loop. YO and draw through 2 loops on hook; repeat from * once more. YO and draw through all 5 loops on hook.
It's easier with the doily in your hands. After a couple of times, it's very easy. Different patterns may vary slightly.
This doily uses bobble stitches for the (red) Holly berries. Different stitch. I don't like it and have avoided patterns which call for it.


Monday, March 21, 2016

Pineapple Wrap: Finished

I really do enjoy finishing a crochet project. I finally can see just how gorgeous all my hard work is. I must also enjoy starting new projects, since I start so many!
This started as a wrapper project.
First change: color. I made it in white.
Second change: stitches. I based it on my pineapple afghan.
Third change: size. Finished size: 96 x 19. Pattern suggested size: 80 x 14.
The afghan has 8 bottom points. The wrap has 4 bottom points.
I bought 2 14 oz skeins. I have just a little bit left of the second skein. I used worsted weight yarn and a size I hook.
The pattern says to make all the bottom points before joining and working rows. You have to mark the right side so that the first row across is always worked on the same side.
I make the first one, don't finish off so that when I've made the second one, I can join immediately.
I had made 2 1/2 pineapples on the outside strip when I started the slits. I worked over 2 strips for the outside. 23 rows made a long enough slit. So I fastened the other skein on and worked over 3 strips for 23 rows for the middle. Fastened off and worked 23 rows over the last 2 strips for the outside of the other slit.
Then I worked across all 7 strips until it was long enough to wrap nicely around me. The outside strips of pineapples are 15 pineapples long. Finally, I was able to finish the 4 points of the longer strips of pineapples.
Much as I want to start another project, and I have yarn/plarn for several, I really do need to finish some others......

Monday, March 14, 2016

Round Ripple Baby Blanket: Finished

This wasn't meant to be one of the blankets for nieces and nephews and my children. I still need 8 more of those. I need to get busy on those, there are now 5 married couples in that group who haven't yet started their families!
No, this is for our orchestra director's granddaughter, who is due in July.
www.crochetingwithval.com/2014/05/ripple-afghan-pattern.html
I'm always glad to finish another project.
I'm also glad when the recipient seems happy to have received something I've made.
Now, of course, I have fewer wip's, so I have to start something else. I've had the yarn for my February afghan for a couple of weeks. So....
Perfect pink, baby pink and soft white. In the same pattern I made for James and Diana.
With any luck, I'll finish it before next February.....

Plarn WIP Basket

It's not as if I don't have enough things to make. My daughters are always thinking up new things for me to make! This idea is thanks to my younger daughter. I have lots of bags piled up waiting to be made into plarn. Sadly, most are just a few of each color. I have a few projects which have been waiting months for more specific colored bags.
So, why not make some smaller striped baskets to hold other WIP? That will use some of those bags and hopefully make my piles of waiting yarn neater.
I've had a shopping bag of target bags in progress for almost a year. I pulled it out and put a partially finished baby blanket in it. Success! 2 projects neater!
Now, I'm going to make a round basket. Start the same as a scrubbie.
Keep going, working increases evenly until the round is big enough. 1 foot is a nice sized bottom of a basket. Then, work even until it's tall enough. If I want the basket to flare open a little more at the top, work a few increases every few rows. I can, but don't have to, add handles. Either in the style of shopping bags or in the style of the toilet top basket.
Then, a round of a contrasting color for visual interest, and I'll have a pretty solution for lots of different colored bags AND those messy WIP


Monday, March 7, 2016

Edging

An edging row sometimes looks (in the pattern) like just an extra, unnecessary step. It takes just that much longer to finish the project! Is this step really necessary? Yes!
 For example,the circle of love doily. The next to last row is small shells. Pretty, but unfinished until the row of ch 3 loops around.
 My gardening bag could have had another edging row on both sides of the handle. It would have looked more "finished" and been sturdier, but it only goes back and forth between my kitchen and garden.
 An ear warmer with contrasting colors for edging.
 See how much smoother the edges look compared to no edging?
 Again, contrasting color edging smooths the edges and adds more visual interest.
This vest has 3 rows of sc as edging/button space. One side has button holes. The buttons are sewn on the other side. There are also 3 rows of sc around each armhole. This edging smooths the sides of the squares and reinforces the joinings.
Flat pineapple angel has a row of ch 3 loops all around. It smooths out the edges.
The contrasting color edging around the afghan ties in with the leaves on the roses. It smooths the side edges and bottom (along the beginning chain).
This is a stocking to hang on my mantle. The bottom edge was smooth, but the picots add visual interest.
Final example, my pineapple capelet. The edging is being worked down, so you can see what a difference it makes.
Edgings smooth edges, add visual interest, unify colors, and reinforce joinings. They help projects look finished and professionally made....definitely worth taking the extra time and effort to do.